- Related Products
- ADAudit Plus
- ADSelfService Plus
- EventLog Analyzer
- Exchange Reporter Plus
- AD360
- Log360

Help Document
Configuring Rest API
REST API is essential to generate reports on your Microsoft 365 environment.
You can configure Rest API manually or automate the process.
Automatic configuration:
- Login to ADManager Plus
- Click Microsoft 365/Google Apps listed under System Settings.
- Choose the Enable Now option listed under Rest API Access column associated with the Microsoft 365 tenant for which the REST API access is to be enabled.
- The next screen with redirect you to the Microsoft 365 login portal. Enter the credentials of the global admin account that you had configured earlier in ADManager Plus.
- Click Sign-in.
- Once this is completed, an application for ADManager Plus will be created automatically. The following page will display the list of all permissions needed by the application. If you would like to change the permissions required by the application, opt for manual configuration.
- Once you are well-informed on the permissions listed, click Accept.
- You will now be redirected to the ADManager Plus console. From the console, you can see that the REST API Access is Enabled for the account that you configured.
Manual configuration:
If you encounter any permission issues during automatic configuration or if you want to change the permissions needed by the application, you can configure the Rest API Access manually.
Azure Portal
- Log into through the Azure AD portal using the credentials of the account for which the REST API is to be enabled.
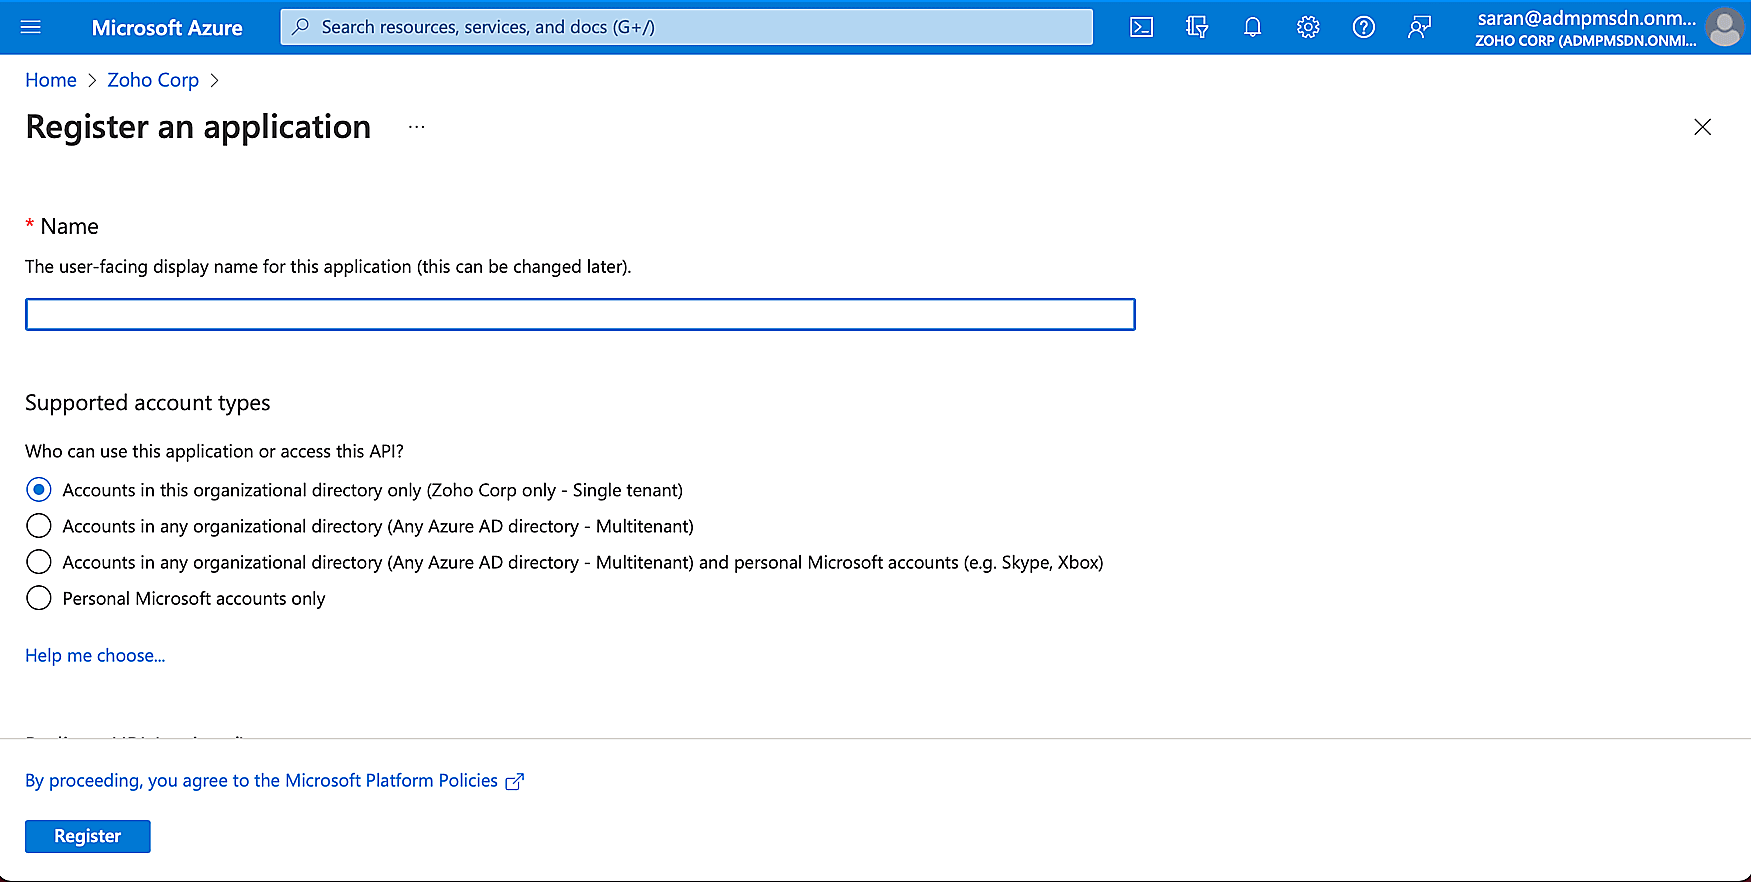
- Select Azure Active Directory → App registrations → New registration.
- If you've already created an ADManager Plus application, select the desired application name. Otherwise, in the Name field, enter the desired name of the ADManager Plus application to be created and click Register.
- An Overview page will be displayed, containing information about the application.
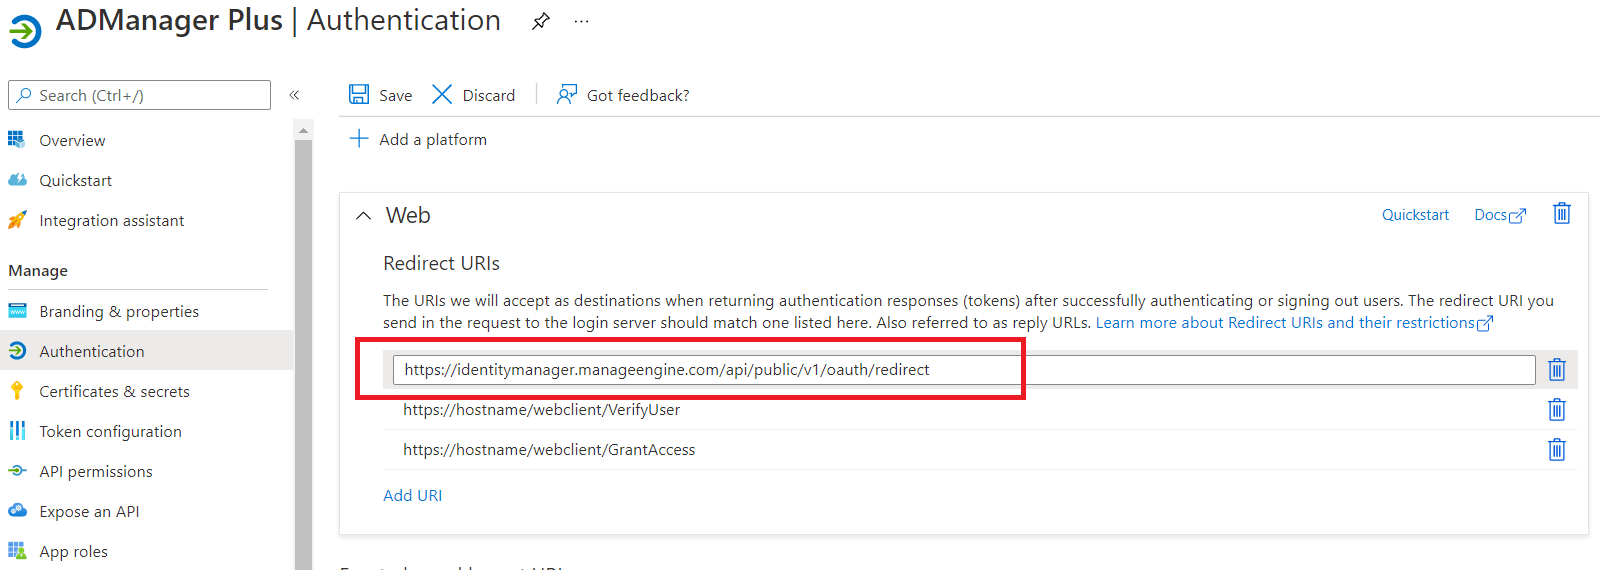
- Click Add a Redirect URI.
- Click Add a platform under Platform configurations.
- In the Configure platforms pop-up, click Web under Web applications.
- In the Redirect URI field, enter http://localhost:port_number/webclient/VerifyUser
- Add the following Redirect URIs in the subsequent rows with Web as the value for Type.
- https://identitymanager.manageengine.com/api/public/v1/oauth/redirect
- https://demo.o365managerplus.com/oauth/redirect
- https://manageengine.com/microsoft-365-management-reporting/redirect.html
- It must be fewer than 256 characters in length.
- It should not contain wildcard characters.
- It should not contain query strings.
- It must start with HTTPS or http://localhost.
- It must be a valid and unique URL.
- For HTTP, the URI value is: http://localhost:8080. If HTTP is used, the machine name or IP address cannot be used in the place of localhost.
- For HTTPS, the URI value is: https://192.345.679.345:8080 or https://testmachine:8080 (where <testmachine> is the hostname of the machine where ADManager Plus is installed).
- Click Save.
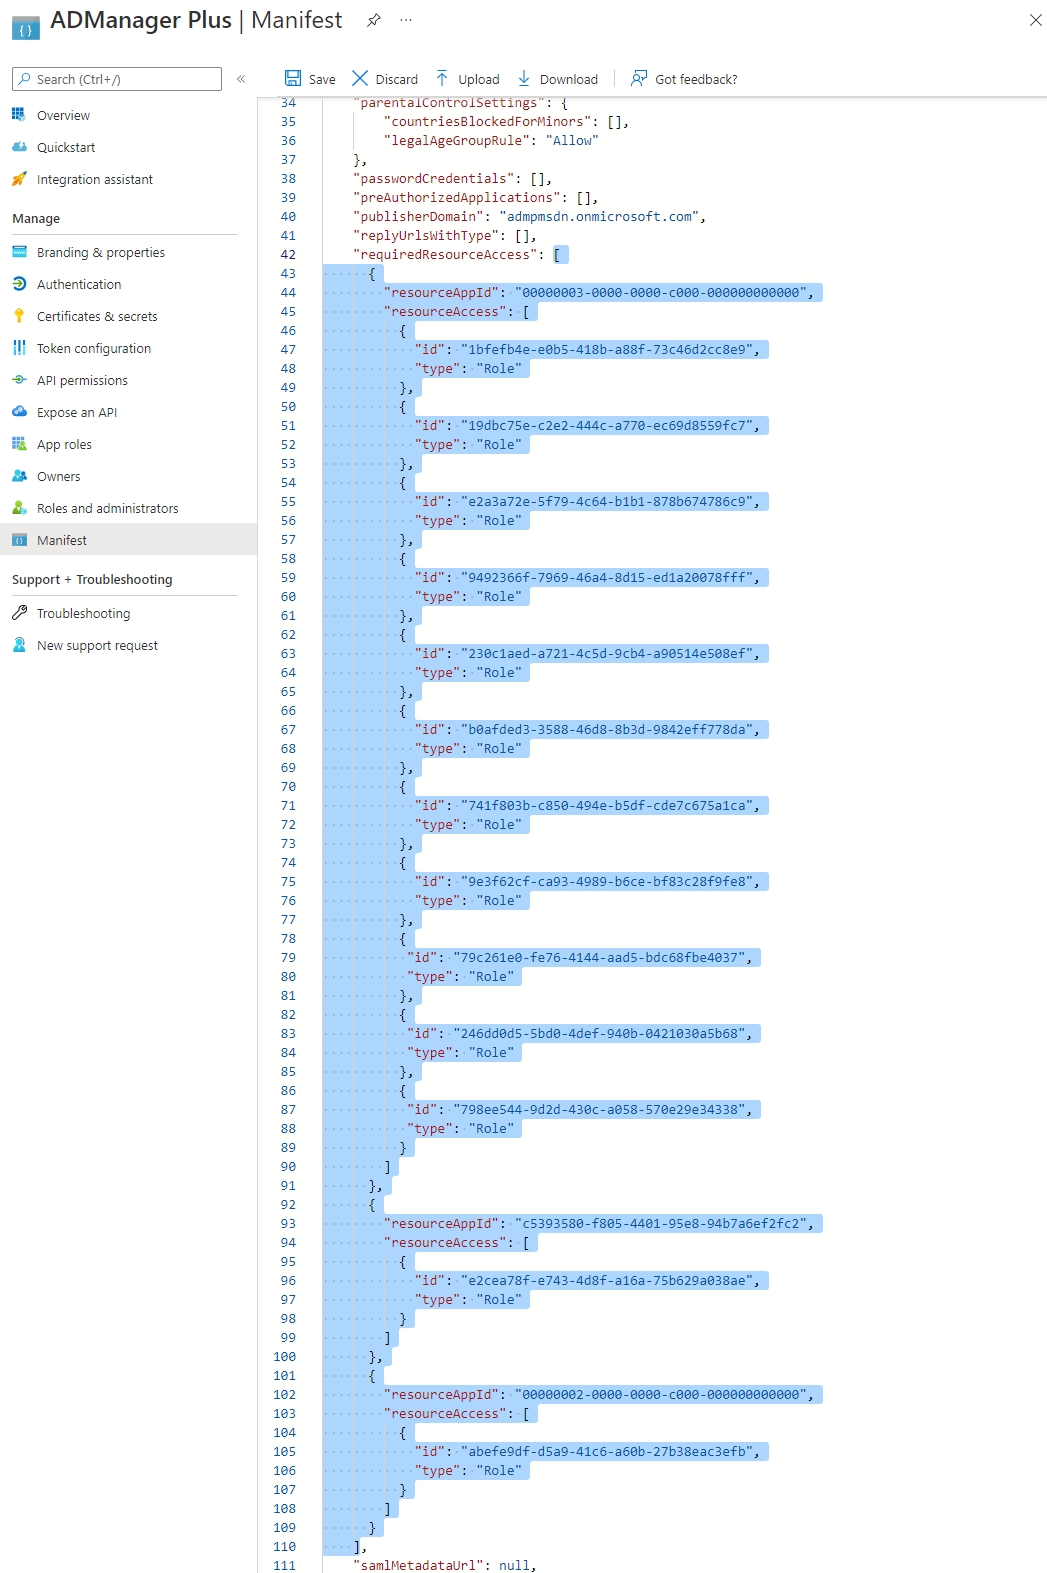
- Click Manifest in the left pane and search for requiredResourceAccess as an array in the code.
- Copy the contents of this file and paste the content as highlighted in the image below and click Save. If you want to modify the permissions to be provided, skip this step and follow the steps mentioned in this guide.
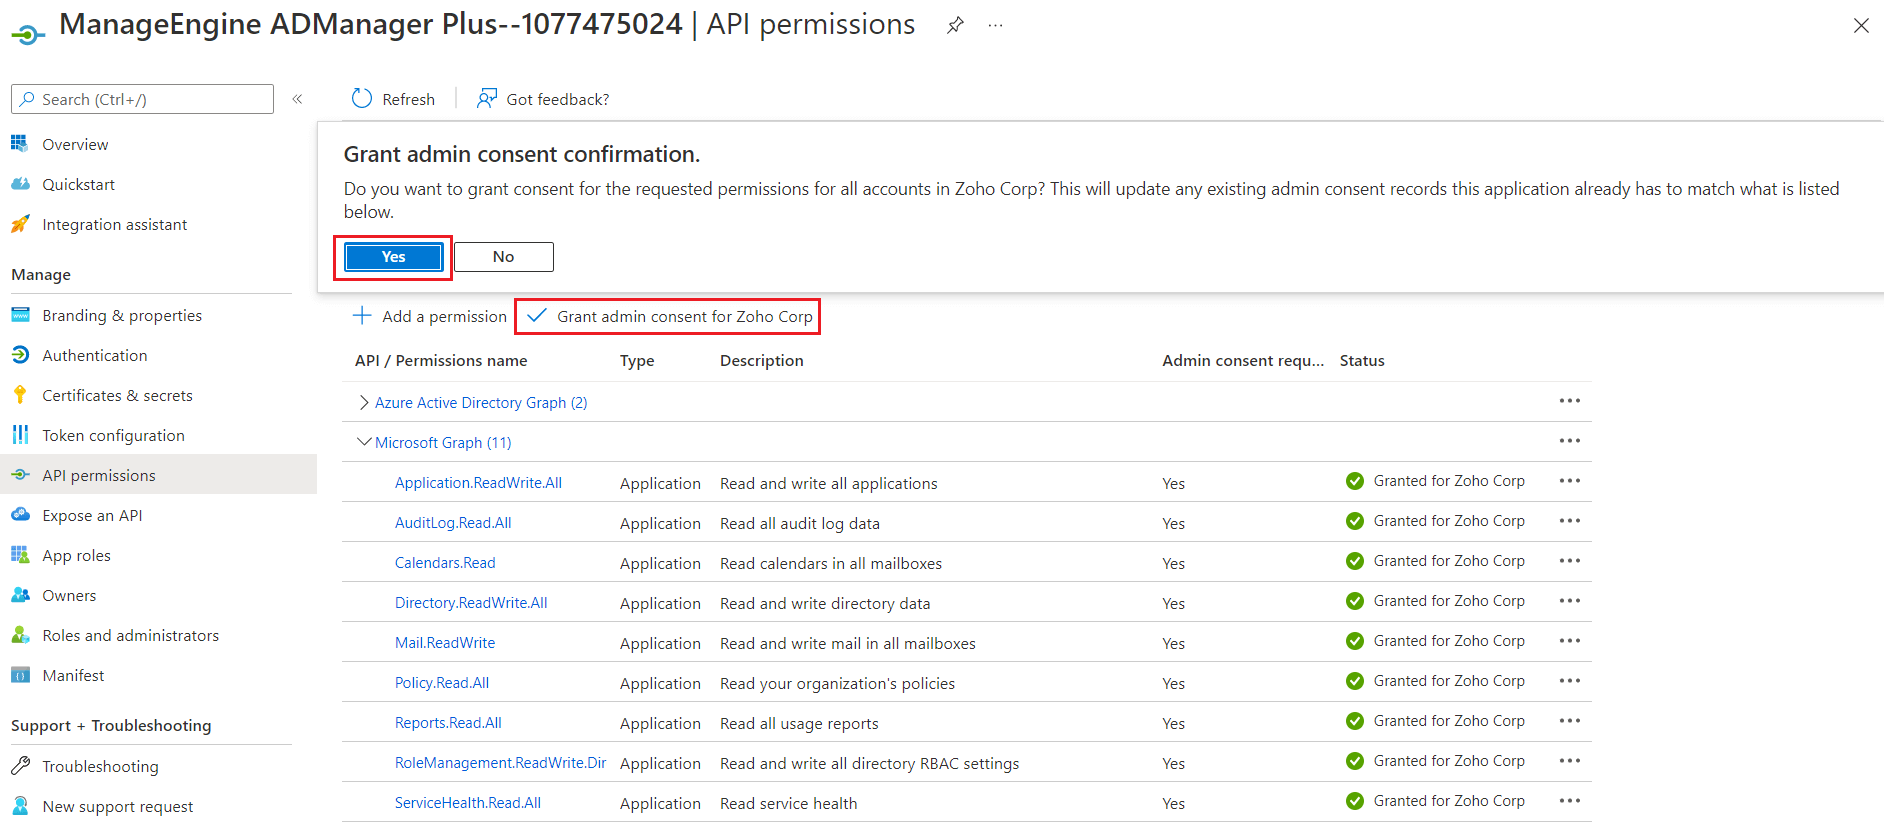
- Click API permissions from the left pane and click on Grant admin consent for <your_company_name> option listed under Grant consent section. Grant the necessary permissions as required. The API permission and its scope are available in this table.
- Choose Yes in the confirmation dialog box that appears.
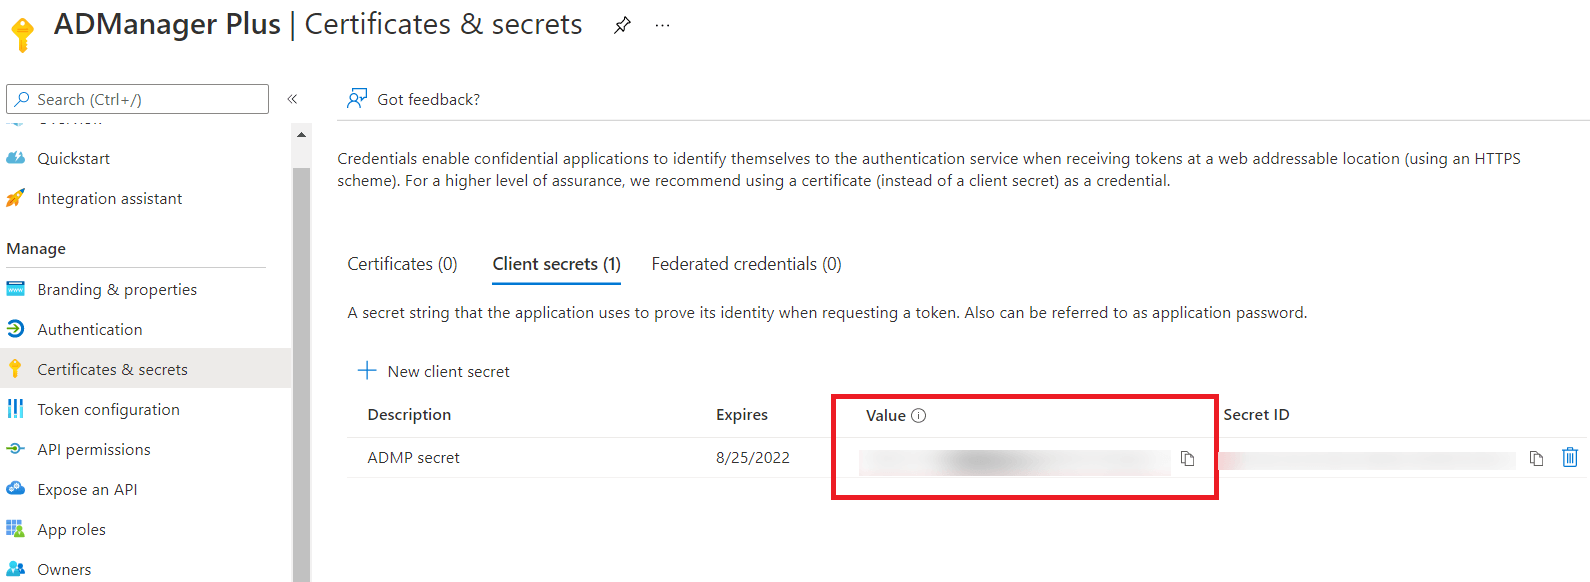
- Navigate to Certificates & secrets → New client secret.
- This section generates the app password for ADManager Plus. Enter a name in the Description field for password identification.
- Configure the password expiry settings and click Add.
- Copy the string listed under Value and save it. This will be required while configuring a Microsoft 365 tenant in ADManager Plus.
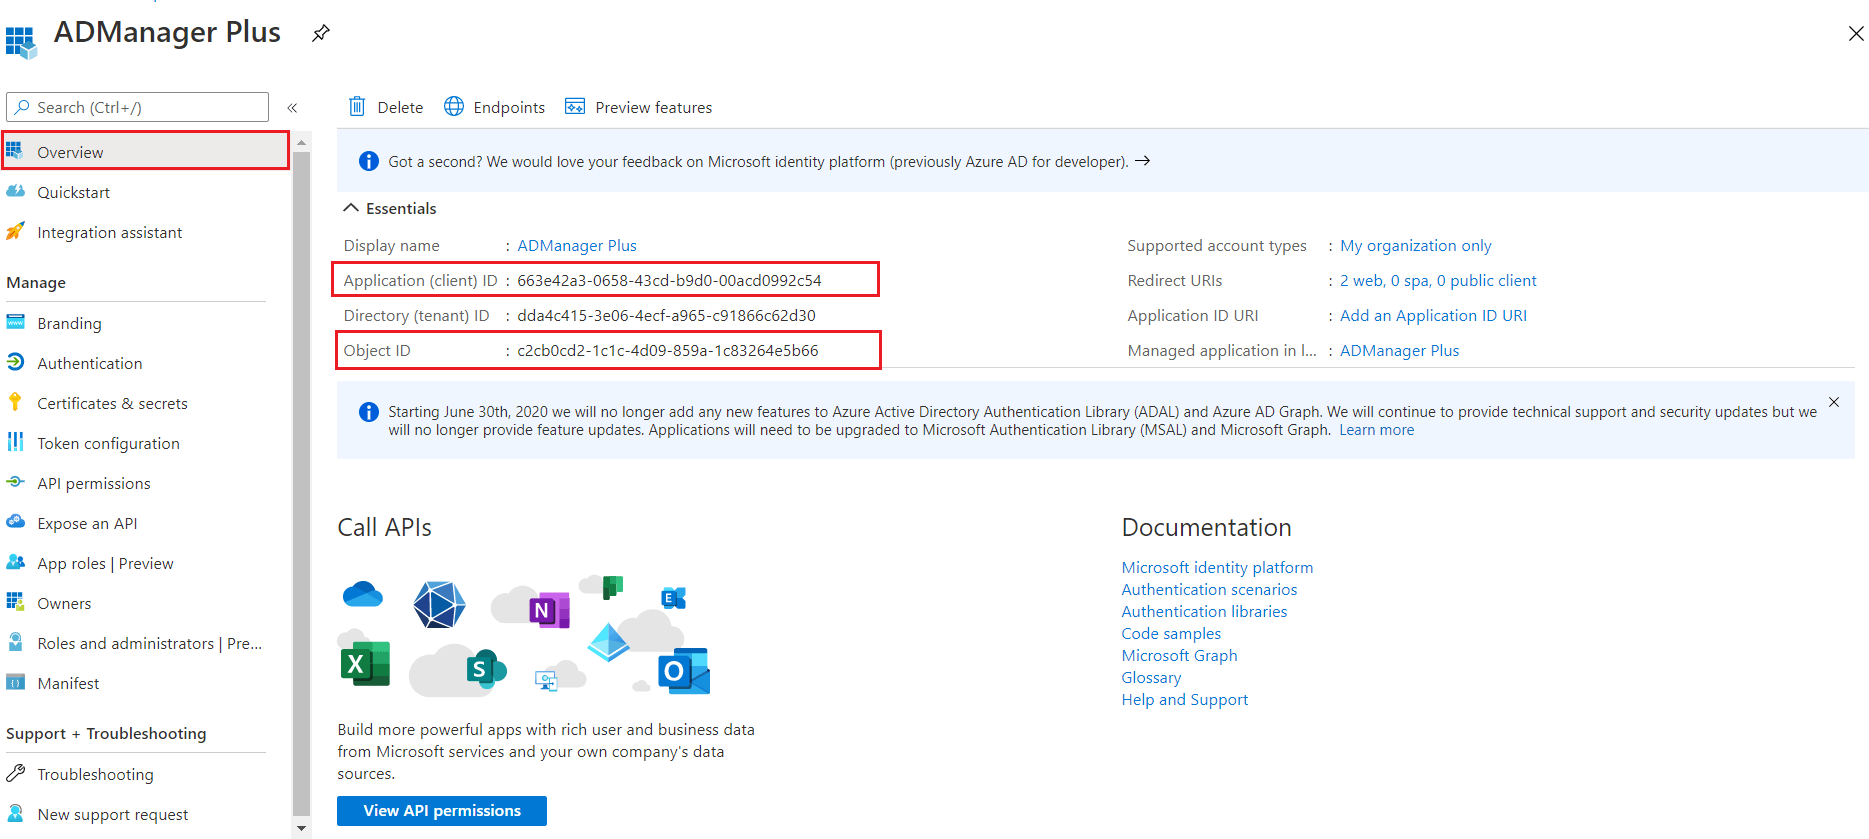
- Navigate to the Overview section in the left pane and copy the values of Application (client) ID and Object ID, then save them for later use.
Note:
The REDIRECT URI should meet the requirements below,
The REDIRECT URI format varies according to the connection type (HTTP/HTTPS) that has been configured in ADManager Plus.
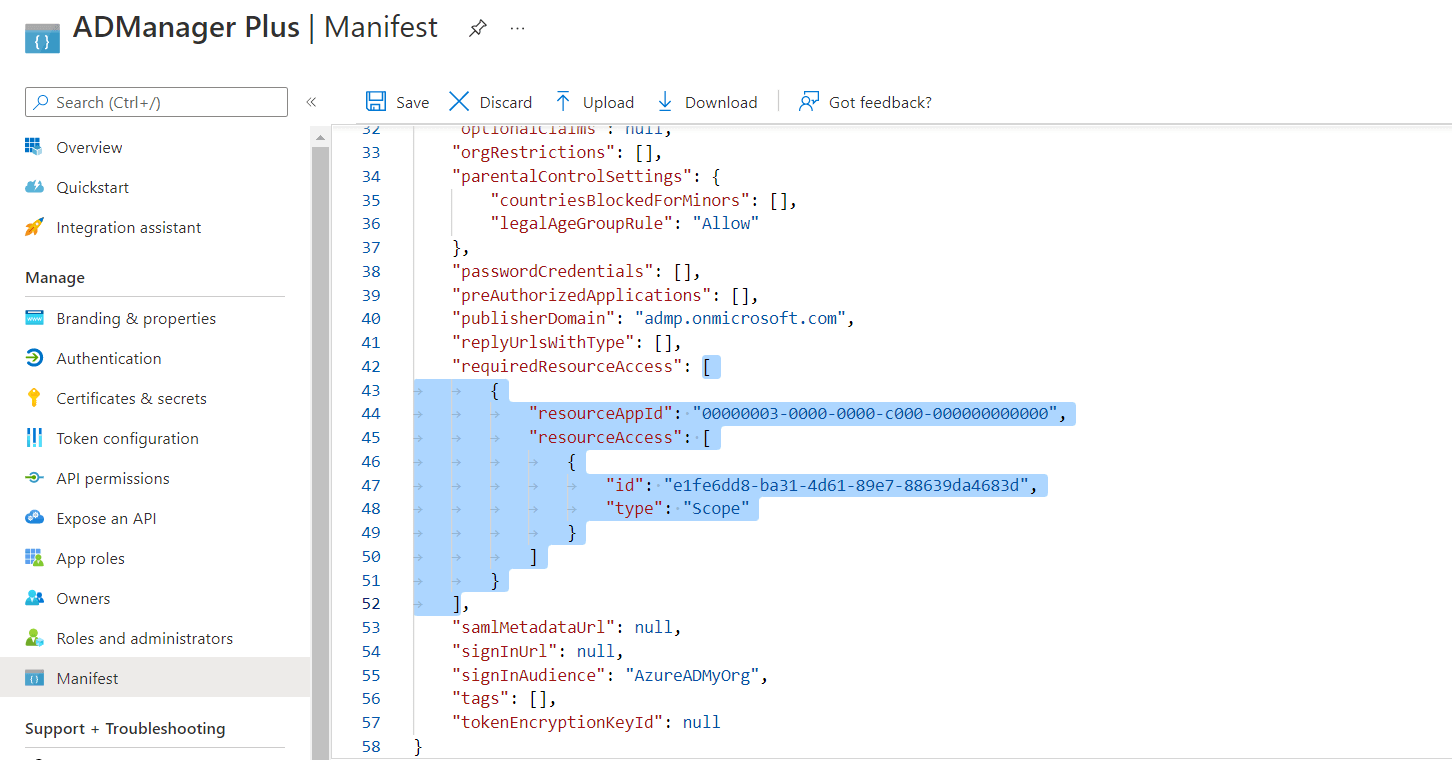
Note: Copy-paste content only from the open square bracket to the closed square bracket. Ensure that all punctuation marks are retained correctly. Once you have pasted the content in the file, it should look like the image below.
Note:
Roles and permissions
The roles and permissions (minimum scope) required for a service account configured in ADManager Plus are listed below.
| Module | Role Name | Scope |
| Management | User Administrator | Manage users, contacts and groups. |
| Privileged Authentication Administrator | Reset password, block or unblock administrators. | |
| Privileged Role Admin | Manage role assignments in Azure Active Directory. | |
| Exchange Administrator | Update mailbox properties | |
| Teams Service Admin | Manage Microsoft Teams | |
| Reporting | Global Reader | Get reports on all Microsoft 365 services |
| Security Reader | Security Reader |
The roles and permissions (minimum scope) required for an Azure AD Application configured in ADManager Plus are listed below.
| Module | API Name | Permission | Scope |
| Management | Microsoft Graph | User.ReadWrite.All | User creation, modification, deletion and restoration. |
| Group.ReadWrite.All | Group creation, modification, deletion, restoration. And add or remove members and owners. | ||
| Reporting | Microsoft Graph | User.Read.All | Users and group members report. |
| Group.Read.All | Group reports. | ||
| Contacts.Read | Contact reports. | ||
| Reports.Read.All | Usage reports. | ||
| Organization.Read.All | License details reports. | ||
| AuditLog.Read.All | Audit log-based reports | ||
| Azure Active Directory Graph | Domain.Read.All | Domain-based reports. |
ADManager Plus portal
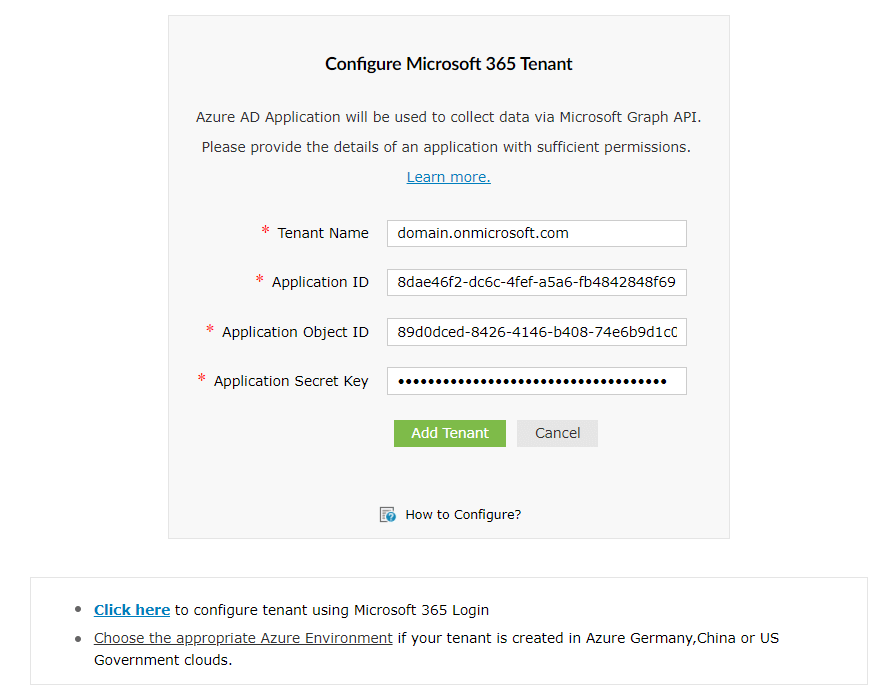
- Open the ADManager Plus portal with the below pop-up:
- Enter your Tenant Name. For example, test.onmicrosoft.com
- Paste the Application (client) ID and Object ID which were saved earlier in Step #16, in the respective fields.
- Enter the Application Secret Key that was saved during Step #15.
- Click Update. The Rest API Access should now be Enabled for the configured account.